....
....

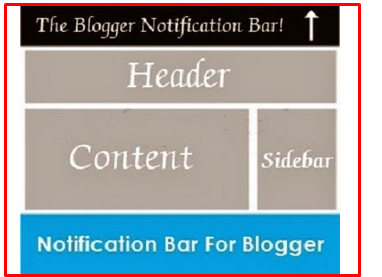
Today I am releasing a professional black notification bar for blogger blog. This notification bar will probably show your most recent article which you need to show up at the top of the header. Most of the bloggers use this notification bar to display their popular posts. The biggest benefit of having notification is that it floats on the webpage that means it shown our desired post even after scrolling the webpage. If you are using a blogger template having no sidebar in it then this notification bar is a must use thing. It will attract all of your visitors to show the desired post you want. So lets start the tutorial on how to add floatingprofessional notification bar for blogger.
How To Add This In Blogger Blog:This is a very simple and two steps process. You can easily add this bar in your blogger blog by follow the below given steps. Remember this notification bar is only for designing, if you want to add links, then you can add your desire links inside the html coding.
Step: 1
*.Go to Blogger Dashboard:
*.Go to Template >> Edit Html:
*.Now find for]]>:
*.Paste the below given code:
/*-------------MBB Notification Bar ----------------*/
#bloggernotificationWrap {
display: none;
height: 41px;
margin: -41px 0 0;
padding: 0;
position: fixed;
width: 100%;
z-index: 999999;
}
#bloggernotification {
background: none repeat scroll 0 0 #000000;
border-bottom: 3px dotted #FFFFFF;
border-radius: 10px 13px 7px 5px;
color: #FFFFFF;
font-family: arial,sans-serif;
font-size: 14px;
font-weight: bold;
height: 37px;
margin: -30px 5px 5px -1200px;
padding-top: 7px;
position: relative;
text-align: center;
text-decoration: none;
text-shadow: 1px 1px 1px #000000;
width: 500%;
z-index: 9998;
}
#bloggernotification a {
border-radius: 3px 3px 3px 3px;
box-shadow: 0 0 5px rgba(0, 0, 0, 0.35);
color: #000000;
font-family: Calibri,sans-serif;
font-size: 13.5px;
padding: 1px 7px;
text-decoration: none;
}
#bloggernotification a:hover {
text-decoration: underline;
}
#bloggernotification img {
display: none;
}
Step 2:
*. Again go to Template:
*.Find fortag:
*.Now paste the below code just aftertag:
*.Now save your Template and you are all done.
Socialize It - Floating Social Sharing Bar With Comments Count For Blogger
Final Words:
This is an easy and step by step tutorial to add professional notification bar in blogger blog. Now It's your turn to share this post with your friends and write your views in comments till then Happy Notifying.
....

Today I am releasing a professional black notification bar for blogger blog. This notification bar will probably show your most recent article which you need to show up at the top of the header. Most of the bloggers use this notification bar to display their popular posts. The biggest benefit of having notification is that it floats on the webpage that means it shown our desired post even after scrolling the webpage. If you are using a blogger template having no sidebar in it then this notification bar is a must use thing. It will attract all of your visitors to show the desired post you want. So lets start the tutorial on how to add floatingprofessional notification bar for blogger.
How To Add This In Blogger Blog:This is a very simple and two steps process. You can easily add this bar in your blogger blog by follow the below given steps. Remember this notification bar is only for designing, if you want to add links, then you can add your desire links inside the html coding.
Step: 1
*.Go to Blogger Dashboard:
*.Go to Template >> Edit Html:
*.Now find for]]>:
*.Paste the below given code:
/*-------------MBB Notification Bar ----------------*/
#bloggernotificationWrap {
display: none;
height: 41px;
margin: -41px 0 0;
padding: 0;
position: fixed;
width: 100%;
z-index: 999999;
}
#bloggernotification {
background: none repeat scroll 0 0 #000000;
border-bottom: 3px dotted #FFFFFF;
border-radius: 10px 13px 7px 5px;
color: #FFFFFF;
font-family: arial,sans-serif;
font-size: 14px;
font-weight: bold;
height: 37px;
margin: -30px 5px 5px -1200px;
padding-top: 7px;
position: relative;
text-align: center;
text-decoration: none;
text-shadow: 1px 1px 1px #000000;
width: 500%;
z-index: 9998;
}
#bloggernotification a {
border-radius: 3px 3px 3px 3px;
box-shadow: 0 0 5px rgba(0, 0, 0, 0.35);
color: #000000;
font-family: Calibri,sans-serif;
font-size: 13.5px;
padding: 1px 7px;
text-decoration: none;
}
#bloggernotification a:hover {
text-decoration: underline;
}
#bloggernotification img {
display: none;
}
Step 2:
*. Again go to Template:
*.Find fortag:
*.Now paste the below code just aftertag:
Your Message here
Socialize It - Floating Social Sharing Bar With Comments Count For Blogger
Final Words:
This is an easy and step by step tutorial to add professional notification bar in blogger blog. Now It's your turn to share this post with your friends and write your views in comments till then Happy Notifying.


No comments:
Post a Comment
What do you think about the above post? Use the comment box to have your say!